Overview of the Tenants Section
The Tenants section in TenantBooks helps you manage all your tenants efficiently, track lease details, and keep your rental business organized. Follow this guide to make the most of the Tenants feature.
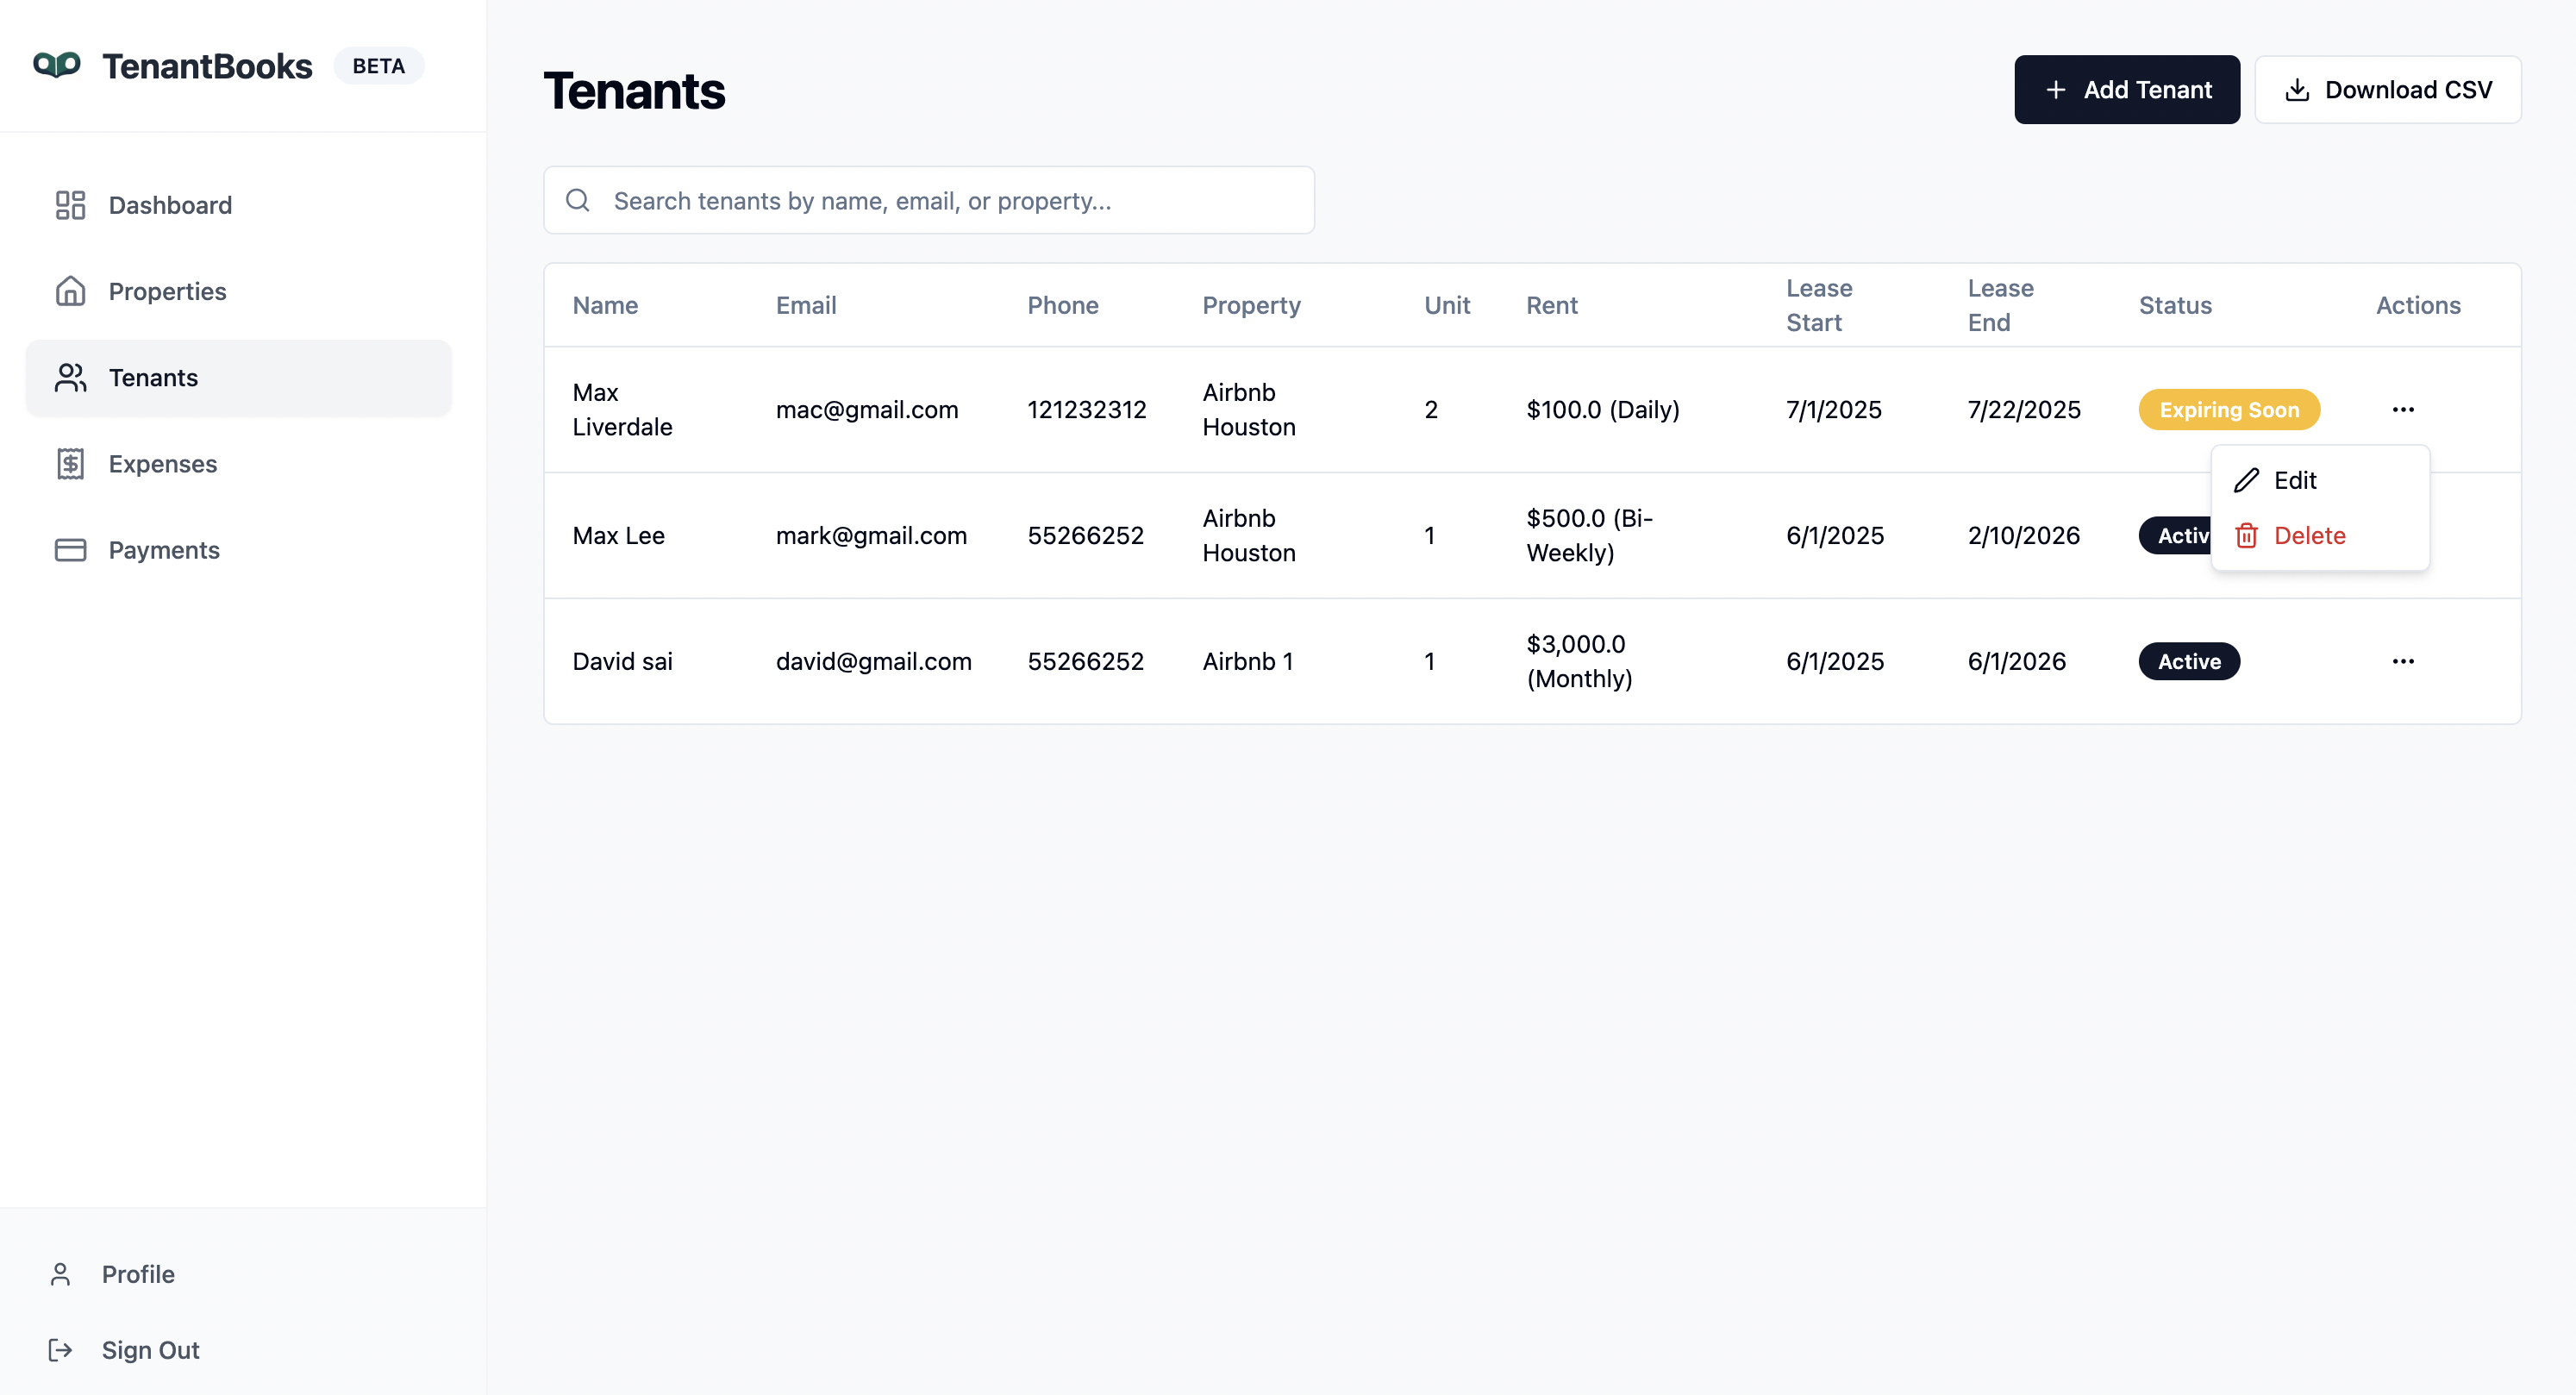
1. Tenants Overview
-
Tenant List: View all tenants in a table format, displaying:
-
Name
-
Email
-
Phone number
-
Property and unit number
-
Rent amount and frequency
-
Lease start and end dates
-
Lease status (Active, Expiring Soon, etc.)
-
-
Search Bar: Quickly find a tenant by typing their name, email, or property.
-
Add Tenant Button: Click "+ Add Tenant" to register a new tenant.
2. Adding a New Tenant
-
Click Add Tenant in the top right.
-
Fill in the form with:
-
First and Last Name
-
Email
-
Phone number
-
Select the property and enter the unit number
-
Set rent frequency (Monthly, Bi-Weekly, etc.) and monthly rent amount
-
Lease start and end dates
-
-
Click Create to add the tenant to your records.
3. Managing Tenant Records
-
Edit or Delete: Use the three-dot menu beside each tenant to edit their details or remove them from your records.
-
Export CSV: Download all tenant data as a CSV file for reporting or backup.
4. Lease Status & Tracking
-
Status Indicators: Instantly see which leases are active, expiring soon, or expired.
-
Lease Dates: Track lease start and end dates for each tenant.
-
Automatic Warnings: The system highlights leases that are nearing expiration, helping you plan renewals or new tenant searches.
5. Tips for Efficient Tenant Management
-
Keep tenant contact info updated for smooth communication.
-
Regularly review lease statuses to avoid missed renewals or vacancies.
-
Export tenant lists for sharing with your team or for accounting purposes.
-
Use the search function to quickly locate tenant records in large portfolios.